Keynote
Resouce: https://www.smashingmagazine.com/2015/08/animating-in-keynote/#keynote
Most people know Apple’s Keynote as the PowerPoint equivalent on Mac OS X — presentation software. That is true, but it can also be used to produce surprisingly high-fidelity animations and prototypes. In fact, many employees at companies such as Google and Apple use Keynote on a daily basis for UI design, animation and prototyping.
Last year, Andrew Haskin, interaction designer at Frog, showed us just how powerful Keynote could be when he recreated Google’s material design animations entirely in Keynote.
Learning Keynote
Andrew’s video really piqued my interest in Keynote, and in the past year I’ve used the software to recreate many interactions seen in major apps, including Facebook Paper, Uber, Tinder, Snapchat and more. You can see a reel of that below.
Keynote is fairly easy to pick up, because most people have used some sort of presentation software in their life. It is very much like PowerPoint if you’re familiar with it, so the interface is recognizable and you will immediately understand how to create and edit slides.
One of my favorite aspects of animating in Keynote is that it is straight to the point — there is no code, complicated timelines with keyframes or unnecessary functionality for designers.
The major legwork of the animation is done with Keynote’s “Magic Move” transition effect. With Magic Move, all you need is a beginning and end slide, and you can edit any number of properties between them (scale, position, rotation, etc). Keynote takes care of the rest by intelligently filling in the gaps, creating a seamless transition from one slide to the next.
Overall Workflow
To demonstrate how to use Keynote, I’ll recreate a very simple interaction model popularized by Tinder: the left and right swipe animation. Download the assets for this project(ZIP, 360 KB).
Video Player
Error loading this resource
The basic idea is to create the first screen of the animation (beginning) and the last screen of the animation (end). Keynote will intelligently take care of the rest with the Magic Move transition.
Set Up the Document
Open a blank white presentation. By default, Keynote will create a presentation-sized document (1024×768px). Let’s change that to more of an iPhone-sized document.
Go to the “Document” tab in the top right. Under the section “Slide Size,” go to “Custom Slide Size,” and make the size 350 (width) × 667 (height) pixels.

Select the “Custom Slide Size” in the “Document” menu, and change it to 350 × 667. (View large version)
Now, let’s import the images. This step is as simple as dragging the image files from your folder onto Keynote’s canvas.
First Slide
Once you’ve dragged your assets over, you can position them visually. Keynote has useful guidelines that appear contextually, helping you to align the design.
Video Player
Error loading this resource
Keynote will assign a z-index to each asset according to when it was imported — it doesn’t have a layers panel. In case you need to change the ordering of the stack, all you have to do is select the asset and right-click (Cmd + click) to bring up the menu, then select “Bring to Front.”

Menu when selecting an asset. (View large version)
If you want to lay out assets with pixel-perfect values, rather than by eye, go to the “Format” → “Align” section and input exact numerical values.

Arrange menu. (View large version)
End Slide
The second screen will be the last frame of the animation. Rotate the top image and position it off screen — this will be the end position.
The first thing to do is duplicate the first slide we’ve been working with. In the left-hand panel, right-click and select “Duplicate” in the menu.

Right-click or use Control + click to bring up the menu to duplicate. (View large version)
Let’s begin by rotating the top asset. To rotate, hold down Cmd, and a rotated-arrow icon will appear in the corner of the selected asset. Then, click and drag to rotate.
Now, position the tile off screen.

Move the asset to its final position. (View large version)
Magic Move
Now that we have the start and end positions, let’s animate this.
Select the first slide, and go to the “Animate” tab on the left. Under “Transitions,” select “Add an Effect” and choose “Magic Move” in the dropdown.

Select the Magic Move transition effect in the “Animate” menu. (View large version)
Magic Move is a transition effect that moves an object from a position on one slide to a new position on the next slide. It intelligently fills the gaps between the slides by moving, fading and scaling the object.
Timing and Acceleration
Magic Move has only two settings, duration and acceleration, which really help your animation look the best it can.
Duration is self-explanatory — it refers to timing, and the correct value is determined case by case. I find that the sweet spot for UI animation is usually somewhere between 0.7 and 1.5 seconds.
The acceleration section has four options:
Demonstration of the various animation types.
- “none” : Same speed throughout the animation
- “ease out” : Starts slow, then speeds up
- “ease out” : Starts fast, then slows down
- “ease out and ease in” : Starts slow, speeds up, then slows down again
For our example, I am using 0.90 seconds for the duration, and “ease in and ease out” for the acceleration setting.

Magic Move settings. (View large version)
Our Animation
Below is the final animation, with some added effects. You can download the Keynote file (ZIP) to see how the rest was done.
Video Player
Error loading this resource
What Else Is Possible?
Obviously it’s a very, very simple example. We’ve just scratched the surface of what can be done in Keynote. Magic Move is the simplest of techniques. For more finesse, you can use Keynote’s build ins and build outs.
Build Ins and Build Outs
Build in refers to how an object appears for the first time, and build out refers to how an animation leaves the screen. These are both object-based animations, rather than slide-based (like Magic Move). In other words, every asset can have its own independent animation.
For example, if you want an animation to scale in and bounce a bit, you would use a build-in effect called “Pop.” If you want the object to fade out, you would use the build-out effect “Dissolve.”
To apply a build-in or build-out effect, select any object on the screen and go to the “Animate” tab. There should be three sections: “Build In,” “Actions” and “Build Out.”

Accessing the build-in section. (View large version)
Build-in animations have a number of options. I use only a handful for UI design most of the time:
Complicated animations can have many build ins and build outs, and timing when each one appears is important. To do this, open the “Build Order” menu at the bottom of the “Animate” tab, and adjust the timing in the menu.

Build order menu. (View large version)
Sketch and Photoshop Integration
Keynote integrates in my design workflow nicely. Importing from Photoshop, Sketch or Illustrator is as simple as copying and pasting into Keynote. I often design in Sketch and copy and paste over to Keynote to quickly infuse some motion into my static mockups.
Video Player
Error loading this resource
A few tips. Copy and paste layer by layer, or else Keynote will combine them, which you don’t want in most cases, especially if you’re animating individual pieces.
Also, if you copy and paste text, it will not retain its text properties, and you will not be able to edit it anymore. When dealing with text, make sure that your copy has been finalized or that you are able to recreate the text in Keynote.
Prototypes on Device
You can also create a prototype and put it on your device using the Keynote app for iOS. It’s as simple as using the “Adding Links” tool to link to different slides in a presentation. Below is an example of an app designed, animated and prototyped in Keynote.
Video Player
Error loading this resource
When sharing prototypes with clients and stakeholders, you can export them as HTML and they will be clickable in a browser. Note that the code will not be production-ready; the design will have to be recreated for the final product.

Exporting to HTML from Keynote. (View large version)
Conclusion
Whether you’re a designer, product manager, developer or anyone else working on a product, Keynote is a great way to communicate ideas quickly. The speed, gentle learning curve and quality of output all make it an ideal tool for your arsenal.
To recap, Magic Move is the simplest and quickest of animation types in Keynote; it is used between slides to animate from a beginning state to an end state. Build ins, actions and build outs are used on individual objects in a slide; they control how things are presented for the first time and how they leave the screen.
With enough practice, you can do virtually any type of animation in Keynote. Many otherexamples show Keynote being used to create high-fidelity animations.
Keynote comes free with Mac OS X Yosemite and above. Give it a try, and happy animating!
苹果就自己有个专门制作原型的团队,他们流窜在各个项目组之间包揽所有的原型制作工作,包括动画和交互。他们的主要工具就是Keynote。
这来自于WWDC 2014 Session Videos里有个视频Prototyping: Fake It Till You Make It ,就是他们指导如何用Keynote做出逼真的交互原型的,这段我也是刚看到,其实一直想补到之前的答案里。下面结合这个视频的截图可以介绍下他们是怎么充分发挥Keynote的特点的。
综述一下先:
- 静态图
- 先用画好的线框图或者直接在keynote里用色块布局
- 填充图片,可调整阴影等基本效果
- 导出图片放进手机里
- 根据用户反馈调整
- 动画效果
- 利用Keynote自带的物件动画
- 活用Keynote最棒的“神奇移动”转场效果
- 手机装上keynote app打开演示文档
- 根据反馈调整效果
- 交互事件
- 调整图片尺寸导入xcode
- 仅用针对图片的简单代码
- 仅用简单的交互手势 代码
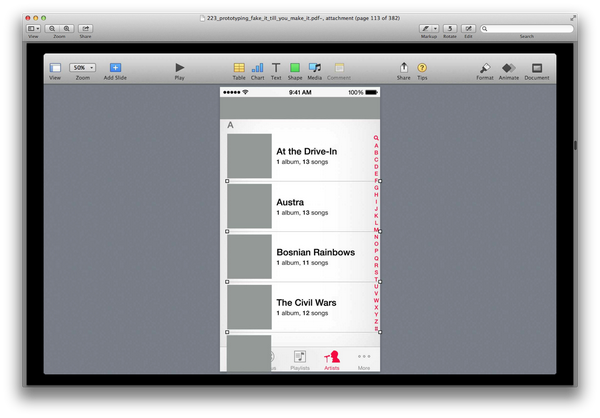
首先:制作静态图。
- 先用画好的线框图或者直接在keynote里用色块布局,keynote提供了多种智能的对齐,布局,格式等等设计方式,整个过程会非常的轻松。比如自动标尺吸附等距等等,比绝大多数原型制作软件都简单人性化。

- 对照一些线框图可以继续铺色块和布局,这个过程中你会发现这个对齐和吸附的过程是多么的神奇。
- 对照一些线框图可以继续铺色块和布局,这个过程中你会发现这个对齐和吸附的过程是多么的神奇。
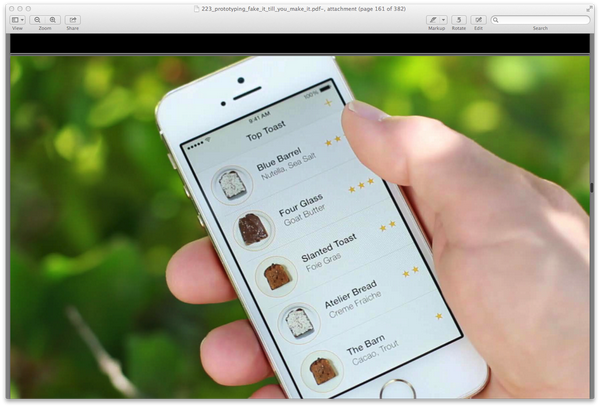
- 导入图片,Keynote有很多种方式可以调整素材样式,包框,阴影,透明图,实时遮罩等等。是的,你可以用PS慢慢玩,也可以用keynote一键完成。
- 导入图片,Keynote有很多种方式可以调整素材样式,包框,阴影,透明图,实时遮罩等等。是的,你可以用PS慢慢玩,也可以用keynote一键完成。

- 很多人用原型软件是看中那些控件,其实大多数控件还不如自己在Keynote里制作快速。而且Keynote自带了很多标志和Icon,完全不用到处去找了。比如这个例子里的打分用五星,改个黄色就可以了。
- 很多人用原型软件是看中那些控件,其实大多数控件还不如自己在Keynote里制作快速。而且Keynote自带了很多标志和Icon,完全不用到处去找了。比如这个例子里的打分用五星,改个黄色就可以了。

- 依次类推,可以很快做出很多页面,导出图片格式,在手机中查看
- 依次类推,可以很快做出很多页面,导出图片格式,在手机中查看
第二阶段,假互动,加入动画效果。具体关于为何这么做,每个阶段完后的反馈过程,目标等等原理的东西请大家看视频或者PDF吧,这里主要说下过程和他们是怎么充分发挥Keynote在原型制作中的特点的。
比如这个假互动的阶段,如果你不用Xcode的话,这个就是交互原型的最后阶段了。基本原理就是活用图片,活用物件动画,活用转场动画,足以做出以假乱真的原型,只要你的测试用户不要瞎点......
关于Keynote自带的动画有非常多种和微调效果,起初我不是很理解,因为很多花哨的效果很难用到幻灯片里,直到开始做原型发现,其实很多动画经过调整都是很好的交互效果,包括现在看到的一些令人惊艳的反弹,延迟等逼真的细节动作,Keynote早就可以微调模拟了。
据说锤子手机和苹果的很多交互效果,都是先用Keynote做出来再给工程师写出来的。(是文末附的许岑视频中说的,好像是,记不清了,无责任据说预警)
- 制作动画有很多方式,可以根据你的职业,习惯选择不同的方法。

也有很多很巧妙的方式,其中最简单,最快的就是一定要灵活运用图片。灵活到什么程度,我举个视频里面全场爆笑的例子。动画是这样的:敲击键盘,字符一个个的蹦着出现在屏幕上。里面说,我可以只用一行或者干脆不用代码就做出来。这个用Keynote就可以实现,各位可以想想。
也有很多很巧妙的方式,其中最简单,最快的就是一定要灵活运用图片。灵活到什么程度,我举个视频里面全场爆笑的例子。动画是这样的:敲击键盘,字符一个个的蹦着出现在屏幕上。里面说,我可以只用一行或者干脆不用代码就做出来。这个用Keynote就可以实现,各位可以想想。

他们是这样做的:
他们是这样做的:
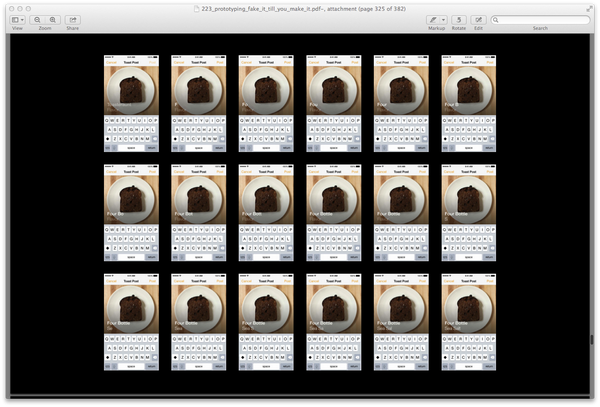
每个字母做了个图片......
还可以通过调整图片的排序大小制作不同的效果。

- 特别提到一个Keynote独有的“神奇移动”效果。可以把前一页中的物件移动或放大到下一页中。效果非常出众。

好了,其实至此,绝大多数的动画效果都可以做出来了。如果不满足于此,学点简单的语法,在Xcode里只用针对图片和交互相关的代码就可以做出更加逼真的原型了。
好了,其实至此,绝大多数的动画效果都可以做出来了。如果不满足于此,学点简单的语法,在Xcode里只用针对图片和交互相关的代码就可以做出更加逼真的原型了。
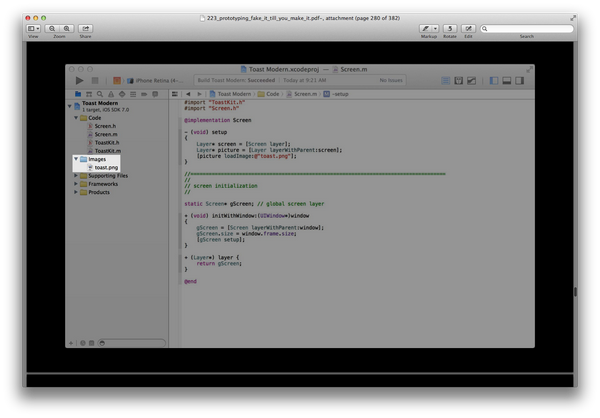
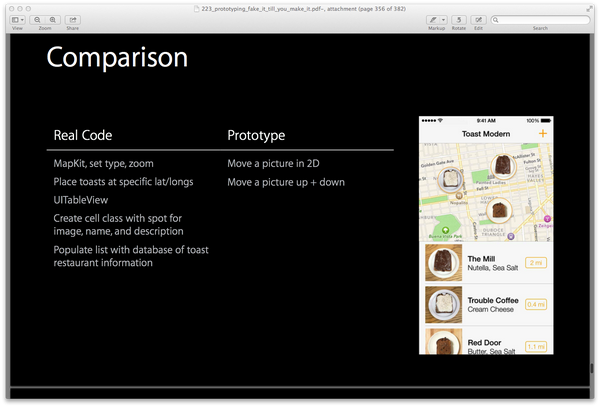
然后比较一下如果用代码实现和用Keynote的差别
然后比较一下如果用代码实现和用Keynote的差别
回顾一下三个阶段:
回顾一下三个阶段:
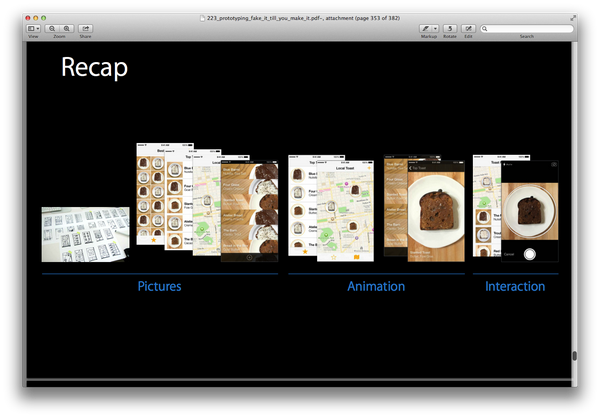

这里就是苹果官方的原型是如何以Keynote为主要工具制作一个足以乱真的App。
这里就是苹果官方的原型是如何以Keynote为主要工具制作一个足以乱真的App。